I have to admit that I am a girl that loves sparkle and as a result I
love glitter! Well, very luckily for me I have recently been sent a few pots of the wonderful sparkly stuff to try out from the lovely people at
Baker Ross, a UK web craft supplier (I'm sure my international readers will be pleased to learn that they also deliver their products worldwide, just check out their website for details).
I spend a great deal of my time
procrastinating searching through the boards on Pinterest (my boards are
here) and came across
this idea to make some glitter gem magnets. This seemed like the perfect project to try out my new glitter pots...except that the ones that I made didn't end up as magnets. They could be of course, just by sticking a magnet to the back, but you can also use them for other things like rings or necklaces. As I've been once again watching my weight, mine have been added into two jam jars to indicate how much weight I've lost (like this pin
here). To see my weight related posts, take a look at this separate
Creative Flourishes page
here.
Anyway, enough waffling, on with how to make them, or how
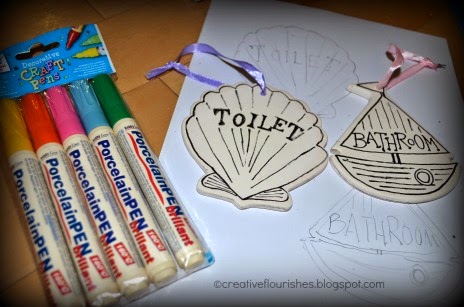
I made them. Starting with gathering your materials together:
I also used some different nail polish colours, other glitters I owned, teeny nail decorations and a jar of clear nail polish to seal them. I couldn't take photographs whilst making them so there aren't any other 'in progress' shots but basically what you do is turn over your glass nugget and spread an even layer of glue on the bottom. Different to the pinterest post I used, I added glitter using my fingers and patted it down into the glue. After letting that coat dry I added more glue & glitter to fill the gaps. I used the traditional way of putting the excess glitter back in the pot using bits of folded scrap paper. I should also add that I did mine outside - on a non windy day!
..which I noticed are now on offer down from £3.50 to £2.99.
I love the way the gems magnify the glitter particles. I'd never noticed that they were teeny little hexagons before!
So pretty:
As you could see the backs of my gems when they were in the jar, I added some dark sparkly nail polish to the back of some of my gems but that isn't necessary for jewellery or magnet use. I should also point out that the nail polish made them and the jar smell very strong!
Don't forget to seal the gems with clear nail polish or varnish of some kind and when dry they are ready to use.
*Sparkle, sparkle*
Hope you enjoy making some of these and
Thanks for joining me today,
Nicky,
Creative Flourishes
Disclosure: I have not been paid to do this review, I was sent the products to try out free of charge but I did not and will not receive any commission on any links listed.