Welcome to my creative online journal

Sunday 27 February 2011

Have a Go ATC

I had fun with tonight's craft and you could too! 

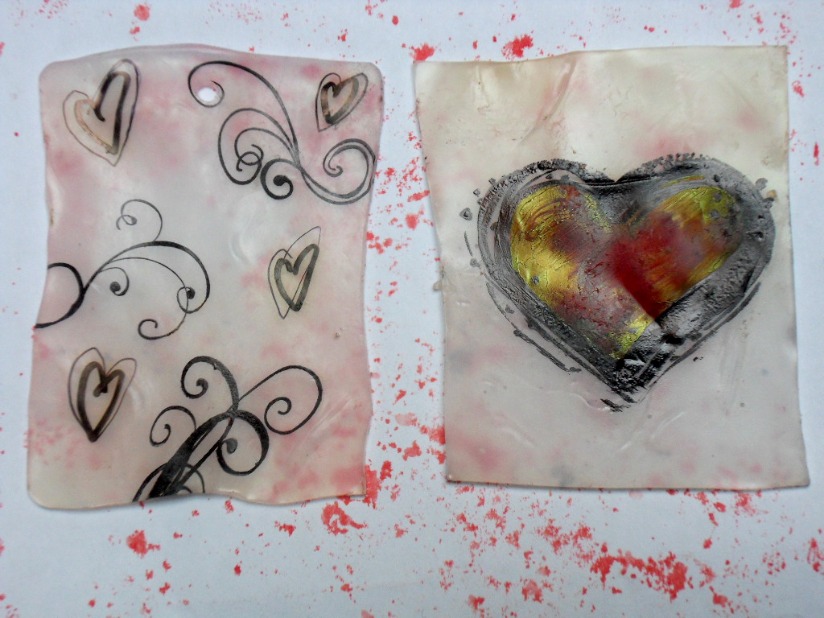
It was my very first (non-swop!) ATC:
..but it wasn't my own design, it was created using excellent step-by-step instructions by Sal Scheibe found here on the free Art Trader online Magazine site.  This particular lesson is from quite an 'old' edition, the one from Autumn 2008 and the lesson is called Whimsy Art for Beginners.  Do scroll down and look at all the editions of the magazine as they are such a great resource with many other fab tutorials and artist interviews.  I myself have spent many happy hours going through every one of them and have still not finished!  

This project notes:  I used Promarkers to colour my picture in and was a bit concerned that I hadn't got enough colours to do the shading.  Luckily I had read in one of the other copies of the magazine that you can do shading with pencil crayons, so that is what I did! ;-)     For the outline I used a non-bleed Fineliner Black Sharpie (I spotted some of these in my local Ryman's, so if you are looking for some maybe you could try there? Your Ryman's obviously!;-).... )  

* * *
Finally, whilst out shopping today, I spotted these in the window of River Island:
You like??  As my dear ol' mum used to say, 'You could break your neck in those!'

Thanks for looking and for any comments,
qwiksave

Thursday 24 February 2011

Spring Lambs plus Fragment Necklace

It was a beautiful sunny day today here in the Midlands, still a bit cold but nice enough for a trip out with my inlaws and my boys on a half term day out to a  fun farm play (& shop!) place.  We went to Hatton Country World, near Warwick where some of the Mama lambs have started giving birth to lots of teeny weeny, cute, baa lambs!   I took quite a few pictures (today's craft is photography!) which I thought could put us all in the Spring mood.

(The effects are courtesy of picnik.com)

..and here are some of the bigger sheep:
they had a great marquis background which is perfect for creative altering!:
...and check out all this fuzzy fuzziness:
This one's my favourite though.  This sheep looks just like a sleeping lion!:
ZZZzzzzzzzzzzz!

* * * * * * * *

Finally, the necklace I made using a Tim Holtz fragment set:
To be quite honest this one went a bit wrong whilst I was making it. I squeezed the Glossy Accents bottle to put the patterned paper on the back, the lid came off and it squirted out all over the place!  Doh!  Ah Well!  There's plenty more fragments left to try and make some more successful ones!

Thanks for reading and for any kind comments,
qwiksave

Tuesday 22 February 2011

Dazzle,Glitter, Shine

Back to crafting (yey!) and this was another little life reminder I have made for myself:
It was created using
A Bazzill template, a sakura glue pen (not pictured) and some glitter. Simply put a bit of glue through the holes of the stencil, take away the stencil and cover the glue with glitter. The writing was drawn freehand with the glue pen and then covered in glitter.

Glitter is really difficult to photograph successfully, so apologies for the pictures, you can imagine it is much more sparkly in real life.

Detailed shots:
This will be one for the noticeboard.

I'm rattling around with the amount of tablets I'm on for the problem eyes, but I'm glad to say that the ones I've been given today have given me some definite signs of improvement. The doctor said that if they didn't get any better then the next stage would be to see the eye specialist.

Thanks for looking and for any comments,
qwiksave

Saturday 19 February 2011

100th Follower Giveaway Result

Ta-Da!! I've used what can only be described as a non-techie way of finding out the winner of my 100th follower giveaway, a box!  Admitedly it was a shiny, attractive, birthday box but nevertheless, a box.  I put in all the eligible names on a piece of paper, gave it a good shake and picked one out at random.  The name picked out was.....
Marg!

Congratulations Marg (MSE), please contact me on my email address with your details so I can send out your goodies.

It was a birthday box because today was my birthday and what a lovely day I've had.  My husband and boys have been spoiling me all day.

Just a few small bits from the day:
given to me by my family & friends

Yes, that is a working clock with legs that says 'Have a Wonderful Life!' on the front (from my youngest son).

As a family we went on a trip to Warwick and I treated myself to some paint brushes and other materials from an art shop there.

This was my boys way of waiting for the bus!:

Thanks for looking and for any comments,
qwiksave

PS.  Apologies for the lack of crafting recently.  I'm now on anti-biotics for the eye and even they are not working!  I wore my sunglasses today and got a few strange looks especially in the rain!

Thursday 17 February 2011

Time for Tea

Quick post from me today, I need an early night. I keep burning the midnight oil and eventually it catches up with me. I've also still got my bad eye, and am going to be seeing the doctor again tomorrow for some investigative tests.

I had a discussion online recently about Papermania/Docraft products being a bit too 'girlie' for me but my make yesterday was almost exclusively made using their stamps:
A birthday card for one of my tea drinking friends - together with her present, a teapot and tea bag set (in the background). The mini silver teapot you see attached to the card is a real tea leaves infuser that came with a little tray (attached to the back of the card) and was from Whittards (as was the tea pot set).

The picture in the middle of the card is a photo I took of the coffee shop/cafe we frequently go to and the receipient and I always have tea (milk, no sugar), which is why I chose this theme. 

So you see! I can do girlie themed makes sometimes... (but won't be making a habit of it!) ;-)

Thanks for looking and for any comments,
qwiksave

Wednesday 16 February 2011

Graffiti Style Dance

The scrapbook page I did tonight has a message that I could do with applying - to myself and I'm not talking about dancing!

This was how the page started.   The image of the dancer was from the internet which I think is of Ziggy Stardust, those of you who are old enough to know the name! ;-)

..And this is how it finished up:
I had a fun but very messy time with some blackboard paint, a red watercolour pen and tippex correction fluid.

When I started this  page, I had no idea of what direction I wanted it to go in, but just knew that I loved and was going to use that dancer image!  I took a few materials into my bathroom studio, along with a crumpled up sheet to protect the floor and this was the result. The quote was from online and I wrote it in the grafitti style to match the boldness of the image.  Just need to remember to apply it!

Thanks for looking and for any comments,
qwiksave

PS  Quick reminder of my follower's giveaway from a few days ago, closing date is this Saturday if you wish to enter.  See this post here for details.

Monday 14 February 2011

Take Me With You!

Quick post for Valentine's Day!

My husband left for the airport early this morning for his weekday work in Germany so we celebrated Valentine's Day yesterday.  He made me a scrumptious meal and bought me a few of my favourite choccies.

While he was snoozing, I tied on these romantic parcel tags to his hand luggage bag.  I bought them (print your own) on Etsy on a whim when I saw them on Twitter.  Glad to see he kept them on as he was going out the door!

Thanks for looking and for any comments,
qwiksave

Sunday 13 February 2011

Shiny Pink Paint Brush Holder

Yesterday I made this paint brush holder out of a beans can which I coloured with alcohol ink.  It is really shiny in real life, more than it looks in the pic.   (A little tip about baked beans cans, for recyling - or for projects like this! - always wash them immediately they are emptied, otherwise they are a devil to wash!)  On this one I added ribbon and a button and tied some matching pink thread through the button holes.

This weekend, my husband and I have been making helping our son make a working model of a canal lock out of balsa wood for his homework.
We haven't quite finished it yet (glue drying) but are hoping that water will rise and fall -and not leak! - in the right places when its finished. My part was helping with the masking and painting, which was quite difficult with my ongoing dodgy eye, but it seems to be looking the part.  Fingers crossed for the rest!  


Hope you've had a good weekend,
Thanks for looking,
qwiksave

Saturday 12 February 2011

Pen made from a Yogurt Pot!

Yes, you read that title right! Although mine was more of a dessert pot, an Aero Chocolate dessert pot to be precise (yum!) 

..and I used the pen to write the word 'Aero' with it.

It's actually only the nib thats made from the yogurt pot, the rest of the 'pen' is in fact a pencil!

(Instruction information further down)

As a money saving tip, I like to look at craft books at both Amazon.com and Amazon.co.uk, particularly the ones that say 'Look Inside' the book.  There are so many that give you step by step instructions on how to do crafts of all kinds, and all free (with just access to a computer). 

Apart from Amazon, if you look up an author of a craft book, it might be worth looking at their publisher's website as these often have great offers, links to other books you might like and in the case of the one I got the idea for this pen from, loads of crafting information too.  I looked up the author of the fabulous book, 'Creative Wildfire' (LK Ludwig), which is an art journalling book I won as a book share from Whoopidooing's Carmen (yey!) and it lead me onto the blog of the book's publishers (I think?!), called craftside. On there you can find example pages from other crafting books and the person blogging often has a go at the craft shown.  

This do-it-yourself pen nib idea was taken from a book called 'Modern Mark Making-Creating your own Pen with Recycled Materials' by Lisa Englebrecht and you can find the instructions here (scroll down)
All you need to make the nib is one yogurt/dessert pot, scissors and some electrical/duct tape.  Plus a stapler and a pencil.

My dodgy eye is still not right, but I was desperate to get back to crafting.  Apart from making this pen today I also made some watercolour embellishments for journalling with:
(Idea taken from a watercolour book on Amazon)
Our family bathroom is now my second artist's studio, lol.

And, (sorry, for the long post today, I'm making up for lost time!) I  also took some close up pictures of one of my son's Union Jack cub's badges.  I love the way you can see the stitches but wish my camera could get even closer.  My old (sadly broken) camera used to, I remember it taking a very detailed picture of my fingerprint!

Thanks very much for looking and for any comments,
qwiksave

(PS.  Followers, don't forget to enter my giveaway on the post before this).

Wednesday 9 February 2011

100 FOLLOWERS GIVEAWAY!!


I'm very pleased to notice that I have reached 100 followers today! Thank you so much for following me and a very warm welcome to all my recent new followers.  To celebrate this ocassion I'm doing a mini blog giveaway which will be open exclusively to the 100 of you that are on my followers list as of this post today (9th Feb).

This is what I'm offering:

1. A brand new but backdated issue of Craft Stamper magazine (Nov 2009) including the free clear stamp that came with it (still attached to front).  It is of snowflakes and a label saying 'Just for You'. Articles inside include how to make a retro minibook and Liquid applique.

2. Another brand new recent issue (October 2010) of Craft Stamper magazine including the free clear stamp (use with an acrylic block) 'Time to Celebrate' in a circle.  This is a very versatile stamp that can be used all year round.  Amongst the articles inside is one on how to make a bracelet out of Precious Metal Clay.

3. A set of two very-difficult-to-get-hold-of (in the UK) Fine Black Sharpie Markers that won't bleed through paper:

4. In honour of the upcoming ocassion, Valentine's Day, a set of assorted coloured glittered mini heart beads from Crafty Bitz that would make a lovely piece of jewellery!

5. Also Valentine's related, a set of mini pink pegs with felt heart embellishments that I have subtley glittered.

6. In the background is a new ink pad, a Tim Holtz distress ink pad in Brushed Corduroy (a medium shade of brown).

and

7. A 6x8" booklet of Beatrix Potter papercrafts. This includes Decorative Papers, Sentiments, Toppers and Borders all on the theme of the cute nostalgic characters created by Beatrix Potter.

Rules of this giveaway:
* It is for present followers of this blog only.  Please do not enter the draw if you are not a follower of this blog already.  You are welcome to join as a new follower but please respect the rules of this particular draw.

* Only one entry per follower please.  To enter please comment on this post by saying what your favourite item in the draw is - or mention a craft that you have liked on this blog.

* This draw is open to present followers Worldwide. I will ship internationally but please make sure you can be contacted if you win.

* The draw will take place on (my birthday) Saturday 19th February and the winner announced shortly after.

Good Luck!
* * * * * * * * *

 I'm sorry not to be showing you a new craft for a little while, I have been dabbling in my craft room (just playing with my recent purchases) but I still have a very poorly left eye.  I've been to the Doctors and have been given some cream (its around the eye) but its not working!  I look as though I've been in a fight with Mike Tyson which is why I made this useful purchase today:

Dark Sunglasses!

Thanks for looking, good luck if you are taking part in the draw for followers,
qwiksave

Monday 7 February 2011

Badge Collection

This picture is of my badge (called Buttons in the US) collection that I found in my attic.  Some of them were damaged by water when our water tank burst and they went a bit rusty.  The collection consists of badges that I have had from years ago, some I acquired from charity shops and some of the newer ones are from Paperchase.

This one's my favourite though:
For those that don't know, this was from an advert from the 1980's(?) promoting a chocolate caramel sweet called Rolos (Nom, Nom!)  The advert finished with the question, 'Do you love anyone enough to give them your last Rolo?'
Perfect for Valentine's!

And the reason I'm showing you these?  On the brilliant blog, artysville Aimee was showing us her button collection and wanted to see some of ours - so here they are.   Have you got some to show?

Back with some crafting later,
qwiksave

Friday 4 February 2011

Love Type Blocks

Today I decided to make a valentine's display for our dining room dresser:
'Pretend' Type-blocks
using Tim Holtz Letter Mask and some old children's play blocks.
I wanted a distressed look that would show the texture of the blocks so I've used wax crayons, a watercolour pen and a knife to scratch the surface of the letter.  I'm not sure it worked so I may just go over the letters with a black pen...

Apologies if the pictures aren't in focus, apart from it being nightime, I've got an eye infection in my left eye now. Can't believe the amount of illness I've had lately, I could do with a break!

I hope the eye clears up for the weekend, I'm due to go to my niece's 1st birthday party. For her present I got her this soft photo album (Amazon) that she can play with:
..and filled it with pictures of her and her family
Love her expression on this one - wearing her halloween outfit.  Not every picture needs to be smiley!

Enjoy your Friday. 

Thanks for looking and for any comments,
qwiksave

Wednesday 2 February 2011

It's February..

...and today I have completed my month's journalling calendar like this:

..for this project:
Link here

On the calendar you fill in the days with a few words of what you've been up to (that takes a bit of work! ; -) ) - and if you wish, show everyone what you've done.  Take a look at the link (above) for other fantastic examples. 

Incidently, if you get the latest issue of  Craft Stamper (UK) Kate has step-by-step instructions on how she creates her wonderful journalling calendar pages.

To make mine I used watercolour pens that I spritzed with water to give that lovely blending effect. 
I must admit I liked the effect so much I didn't want to cover it with the dates - so I compromised and put the date circles randomly over the page (on acetate) so I could still see what I considered the 'best' bits.
I also completed the January page which I shall probably put on here - once I've checked what I've written on it! ;-)

Thanks for looking and for any comments,
qwiksave

Tuesday 1 February 2011

xxx Shrink Plastic Valentine xxx

I'm Back! I had a slight problem with my mojo for a few days, but I've been going through all my old craft magazines and now have quite a long list of techniques that I'm itching to have a go at.  Yay!

Today I had a go (although not for the first time) at Shrink Plastic on this Valentine creation:
The heart shape on the shrink plastic was made with a stamp and has a rough thick black outline so I kept  that as my theme.  After matting and layering the shrink plastic I added the other details freehand with a Sharpie (apart from the ribbon, which is made of chiffon material and came from Ikea).  The rough lines are of course, deliberate! ;-)

I actually made two pieces of Shrink Plastic:
Amazing how the heart looks almost golden in daylight, whereas it looks red at nightime. 
This was the swirly one against today's blue sky:
(Shame its still so cold, despite the blue sky.  Roll on Spring!)
I will be using this piece of shrink plastic on another creation.

* * * * *

Finally today, I thought I'd show you this recent purchase from the sales:
 A waterproof notebook!
(Hawkin's Bazaar £4)  Whatever next!

Thanks for looking and for any comments,
qwiksave
Related Posts with Thumbnails